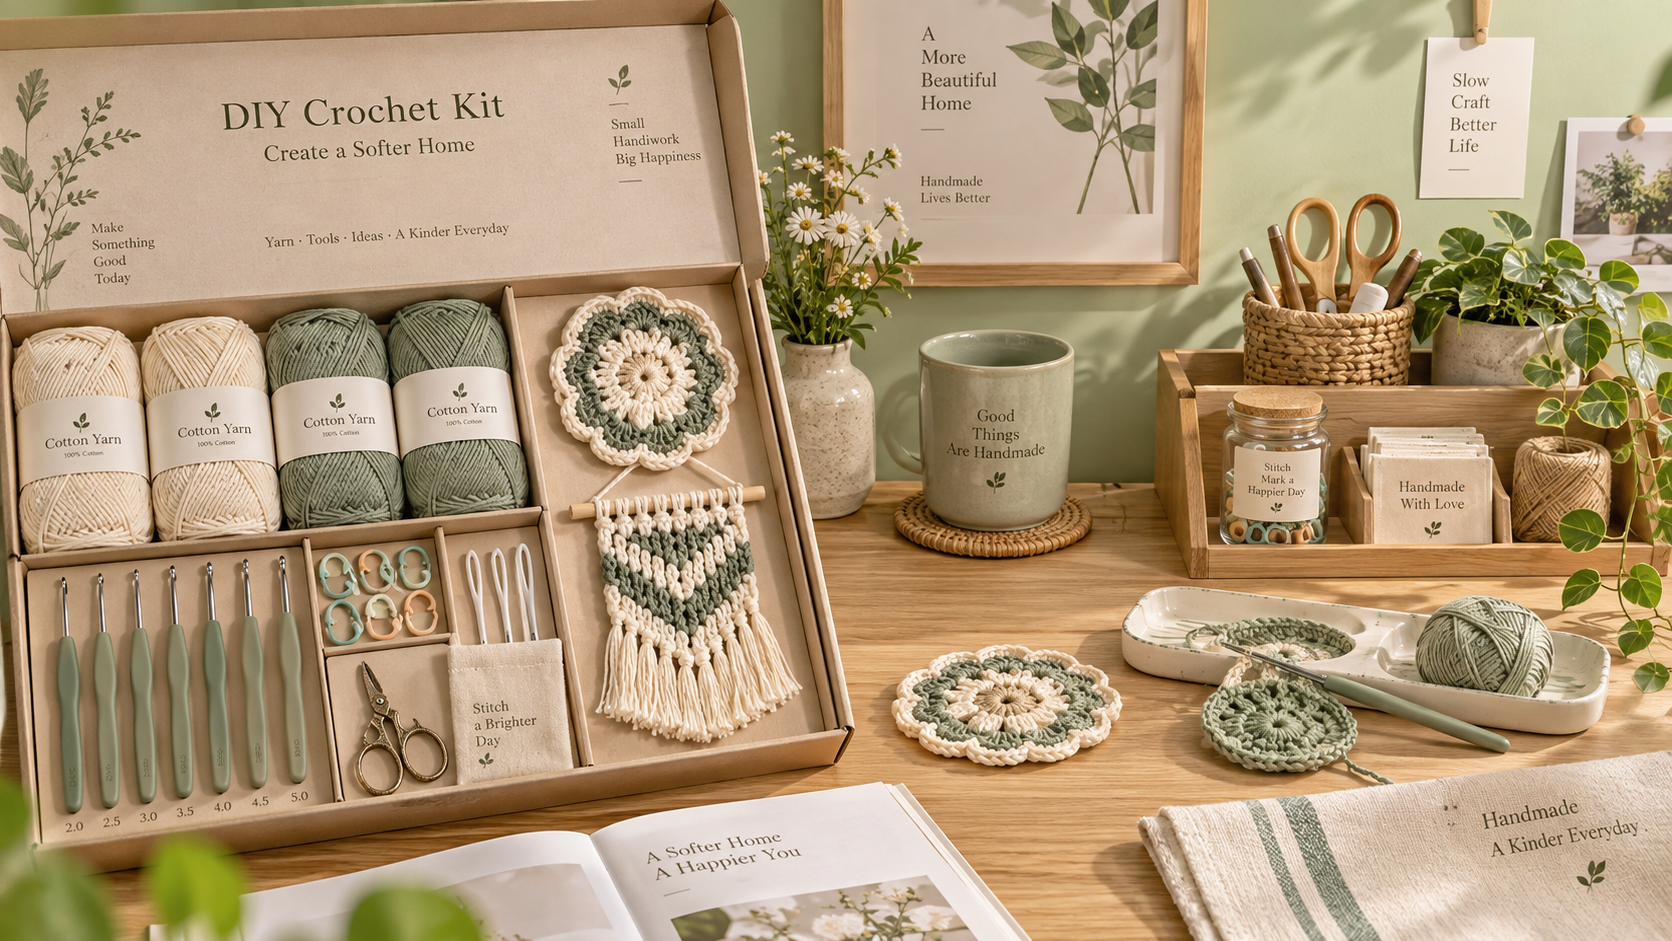
A workshop runs smoothly when every seat opens the same prepared diy crochet kit, with materials sized for the project and arranged in the order they will be used. A basket that looks attractive but contains mixed yarn weights, unlabeled hooks, or instructions written for an experienced maker quickly creates uneven progress. Plan the kit around one finishable decorative object, then build in enough visual and material guidance for the group to stay together without constant interruptions.
Begin with the finished object and the teaching time
Choose a project that demonstrates a useful crochet motion while remaining realistic for one session. A small coaster set, a textured mug rug, a simple plant-pot cover, a mini wall hanging, or a basic granny-square cushion panel gives a clear decorative outcome without requiring complicated shaping. Flat pieces are easier to correct than fitted forms, while projects worked in joined rounds demand closer attention to counting and stitch placement.
The intended display location should influence the project choice. A coaster needs a washable yarn and firm fabric; a wall hanging benefits from texture and a stable hanging loop; a basket needs structure, so soft yarn alone may not hold its shape. Avoid selecting a design only because its finished sample looks polished. A design with frequent color changes, narrow stitches, or several assembly stages can be enjoyable in private but difficult to pace across a group.
Break the pattern into teaching milestones before assembling materials: forming the starting loop, making a foundation chain, working the first row or round, turning or joining, recognizing the final stitch, and finishing ends. If a milestone cannot be demonstrated clearly from the supplied materials, revise the project before ordering or packing the kits.
Match yarn, hook, and pattern instead of choosing them separately
Yarn texture determines how easily stitches can be seen and corrected. Smooth, light-to-medium colored yarn exposes the V-shaped stitch structure, making it appropriate for early instruction. Very dark shades hide the entry point for the hook. Fuzzy, eyelash, chenille, and highly textured yarns create appealing home accents, yet they obscure loops and make it harder to identify an accidental increase. Reserve those yarns for an optional trim or for projects where the base has already been established.
Do not rely on a yarn label alone when deciding hook size. The label suggests a useful starting range, but the sample fabric decides whether the pairing works for the selected object. A loose hook-and-yarn combination may produce a drapey swatch that is suitable for a garland but too open for a coaster. A tighter combination produces a more stable fabric, though it can make the hook difficult to insert and tire hands during a longer session.
Create and wash a sample before finalizing the kit. Shrinkage, color transfer, and edge distortion are easier to discover in a sample than after a room full of projects has begun. For a home decor item expected to be used or cleaned, include care wording that matches the actual yarn composition rather than applying a generic washing instruction.
Pack each station so materials support the sequence
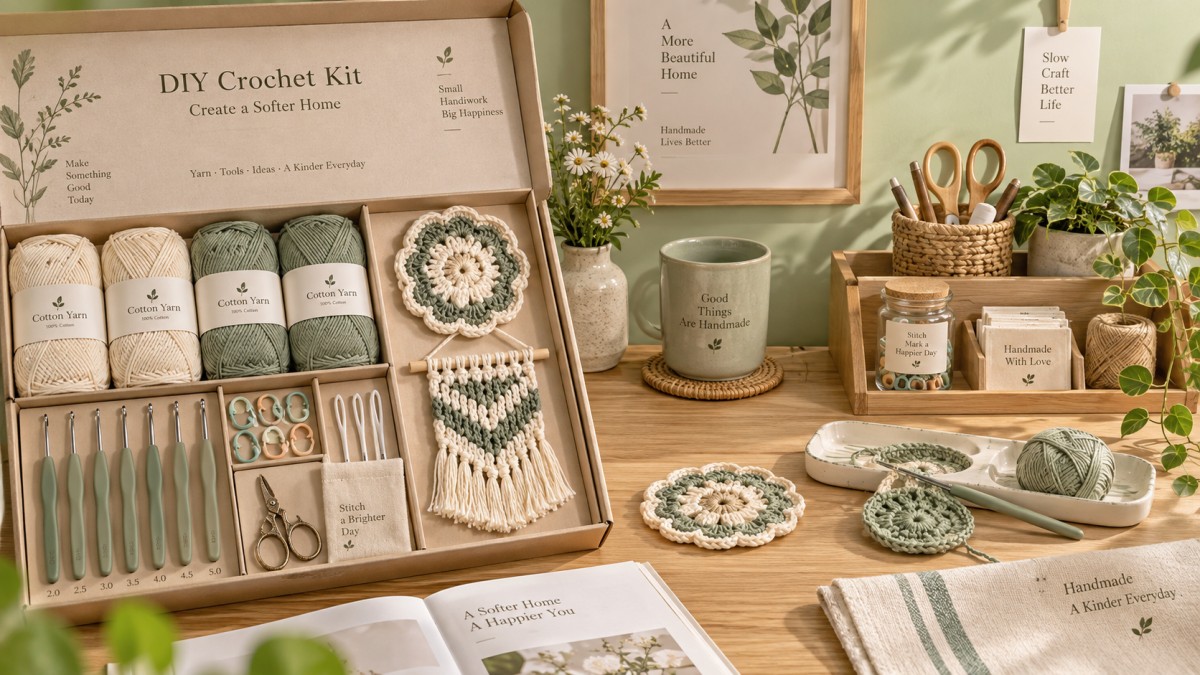
A sealed kit should prevent missing pieces, not create a search task. Put the project yarn in one labeled bundle, with each color separated and identified by the same symbols or names used in the instruction sheet. Short yarn lengths are prone to tangling when loosely packed; winding them into small cards or individual sleeves preserves order. Include a practical allowance for starting tails, practice stitches, mistakes, and weaving ends. Exact consumption from a perfect sample is not a reliable packing quantity.
Use hooks with a comfortable, clearly printed size marking. Hooks that look similar but differ slightly in diameter can produce noticeably different fabric density. When a group needs a consistent outcome, supply the specified hook rather than asking participants to bring one. A yarn needle with a large eye, a small pair of scissors, and stitch markers address the most common finishing and counting interruptions. Blunt-tip needles are suitable where a lower-risk finishing tool is preferred, but they still need to pass through the chosen yarn without splitting it.
Place a small practice length in the kit when the main yarn is limited, expensive, or difficult to replace. This gives space to rehearse chain tension and single crochet before the decorative piece begins. It also prevents the first row of the project from becoming the only place where new movements are attempted.
Write instructions for recovery, not only for perfect progress
Pattern language needs to be brief, visual, and locally complete. A page that says “repeat the established pattern” is efficient for experienced crocheters but unhelpful when the group has been interrupted or is working at different speeds. State the stitch abbreviation, its written action, the expected stitch count, and a small image or diagram of the relevant row. Give each row a distinct label so that a paused project can be restarted without guessing.
Counting errors need their own guidance. A piece that grows wider often contains an unintended extra stitch at the turning edge. A piece that narrows commonly misses the final stitch, which can be visually hidden under the turning chain. These two problems look similar from a distance because both cause an uneven edge, but their correction is different. Marking the first and last working stitches makes the source easier to locate before several rows are added.
For rounds, state whether the turning chain counts as a stitch, where to place the join, and whether the work is turned between rounds. Omitting any of these details creates conflicting results even when everyone follows the same stitch count. Provide a close-up reference of the join because it is often mistaken for a regular stitch.
Set up the room around shared demonstration and independent work
Arrange seats so the opening demonstration can be seen from more than one angle. Crochet is directional: a right-handed demonstration may be difficult to mirror from directly opposite, and left-handed participants benefit from a separate visual reference or a leader positioned to show the movement from their perspective. Keep a prepared sample at each important stage rather than relying on a single completed object. A first row, a midpoint, and a finished edge make it easier to diagnose where work diverged.
A central repair tray is useful for spare hooks, additional markers, extra needles, and pre-cut yarn for joining or finishing. Do not mix these loose supplies into every kit unless the project truly needs duplicates. Central spares reduce waste while keeping the individual package focused. However, scissors and yarn needles needed during the final portion should be available at each table before finishing begins; a shared pair becomes a bottleneck when several pieces reach the same stage.
For workshops that include more than one needlecraft method, keep the kits visually distinct. Cross stitch materials have different counting and tension cues from crochet. A separate packaged reference such as Wholesale OEM ODM Personalized DIY Cross Stitch Starter Pack, Custom Floral Animal Seasonal Cross Stitch Kit for Classroom Home Leisure Needlecraft Decoration illustrates the value of matching color-coded thread, fabric, needles, and a detailed guide to one specific technique. Combining unlike instructions in the same packet can cause confusion unless the session intentionally moves from one craft to the next.
Inspect the kits as a working set
Before distribution, open a randomly selected kit and complete the project using only what is inside. This reveals whether the yarn colors correspond to the guide, whether the hook marking remains legible, whether the scissors can cut the yarn cleanly, and whether the packaging leaves enough room for materials to be returned between stages. Count the individual components against the packing list, then check that all kits share the same revision of the pattern.
Label completed work with the yarn type and care note before it leaves the session. A decorative sample may be displayed beside heat, moisture, sunlight, or frequent handling, and its maintenance needs follow the material rather than the appearance. That small record preserves the value of the finished piece and makes later repair or replacement far less uncertain.
Leave A Message
If you are interested in our products and want to know more details, please leave a message here, we will reply you as soon as we can.

We specialize in supplying home decor, handicrafts, and daily necessities.


